Photo-day timeline help & support
Everything the Timeline tool does, in plain English, from your first sign-in to a finished photo-day timeline your whole crew works from. Short steps, no jargon, written for a phone in one hand at a venue. Can't find your answer? Get in touch; a real person reads it.
Getting started
Sign in with a magic link
- Go to the sign-in page and drop in your email.
- Tap Send magic link, then open the email and tap the link.
- That's it. No password to invent, forget, or reset.
First time in, we'll ask one question (planning an event, or on a media team?) so your dashboard shows the right things. Planners land on event creation; team members land on the events they've been invited to.
Create your first event
- From the dashboard, tap + New event.
- Give it a title, a date, and (if you like) a start time and location.
- Pick a template (full wedding day, elopement, corporate event, family session) or start blank. Templates drop in sensible moments you'll adjust; nothing is locked.
Building your timeline
Add a moment
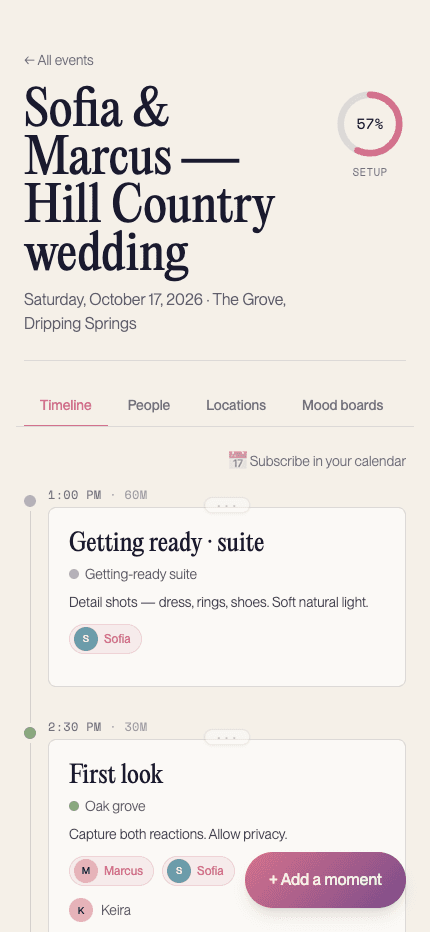
- On your event's Timeline tab, tap + Add a moment.
- Set the time, how long it runs, and where it happens.
- Add the people in the shot and the team member covering it, then save.
A moment is anything the camera cares about: getting ready, the first look, a keynote, the group photo, the last dance. If it has a time and someone should be pointing a lens at it, it's a moment.
Retime by dragging
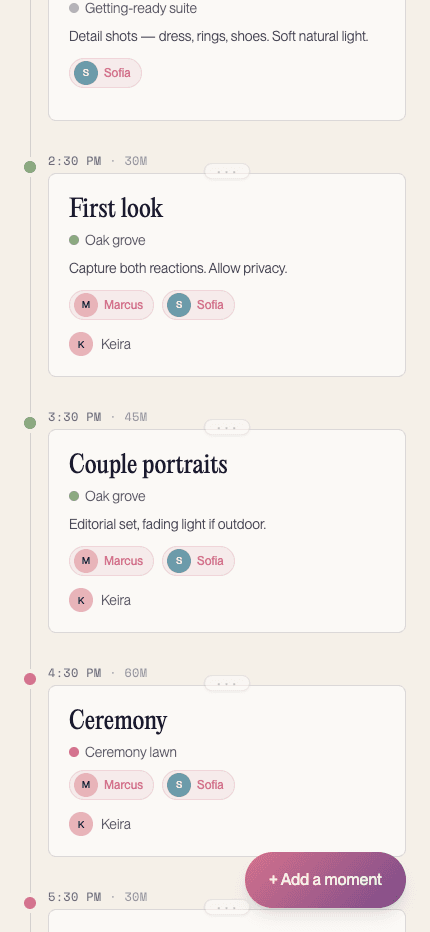
Grab a moment's grip handle and drag it up or down the day. Times update as you go, and on a multi-day event you can drag straight through midnight into the next day. For big jumps between days, the Day dropdown in the moment's editor is quicker.
Multi-day events
Give an event an end date and every day gets its own section on one timeline. A wedding weekend or a two-day conference reads as one plan, one link. The calendar subscription and the public share link both cover every day of the event automatically, nothing extra to set up per day.
Your people
Add subjects: the people in front of the camera
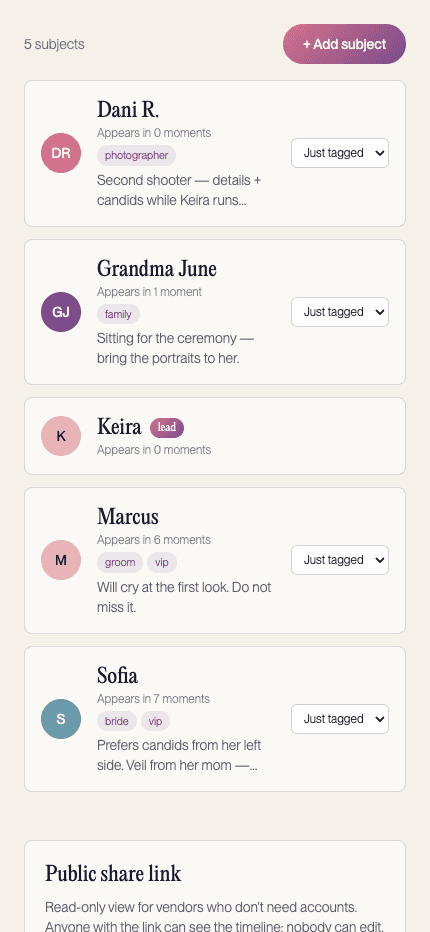
On the People tab, tap + Add subject. A subject is anyone the camera needs to know about: the bride, the CEO, grandma. Add a photo (JPG, PNG, or WebP, 2 MB max), tags like “family” or “vip”, and notes that help the team shoot them well. Subjects don't need accounts. They're on the list, not in the app.
Invite your photo team
Inviting someone is a two-step: save them first, invite them second.
- Add the person as a subject (check Team member if they'll be assigned to moments) and save.
- Reopen them from the People list, enter their email, and pick their Timeline access level.
- Tap Send invite. They get an email; when they sign in, everything's already connected.
Already-saved people show Resend invite if the first email got buried.
What each access level can do
The Timeline access dropdown has three levels:
| Level | What it means |
|---|---|
| Just a subject | On the shot list, no timeline access |
| Can view | Sees the full timeline, can't change it |
| Can edit moments | Can add and adjust moments |
Co-lead is separate. It's the Make co-lead action on a person's People row, and it means running the event with you: full access, including managing people. While someone is a co-lead, their access dropdown is locked (they already have everything).
Access is per-event. Change it anytime from the People tab.
Sharing it
Public share link
For vendors who just need to see the plan:
- On the People tab, tap Generate share link.
- Send the link to anyone: your caterer, the venue coordinator. No account needed; they get a read-only page with the current timeline each time they open it.
- Done with it? Revoke it from the same spot; the old link stops working immediately.
Subscribe in your calendar
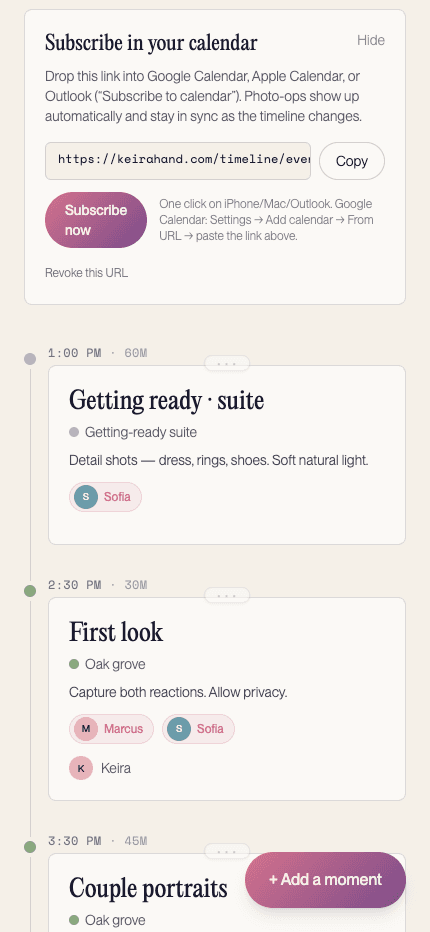
On your event's Timeline tab, tap 📅 Subscribe in your calendar, then Get my subscription URL. Subscribe now adds it to Apple Calendar or Outlook in one tap; for Google Calendar, paste the URL following Google's add-by-URL steps (Settings → Add calendar → From URL). Moments stay in sync as the timeline changes.
Mood boards
On the Mood boards tab, link a Pinterest board or upload images, then attach inspiration to any moment, so the reference lives right next to the moment it belongs to.
Troubleshooting & FAQ
- How do I create a photo-day timeline?
- Create an event, pick a template (or start blank), and adjust from there: retime moments by dragging, add the people in front of the camera, assign who's covering what. The sections above walk through each step in order.
- I didn't get my magic-link email. Now what?
- Check spam first, then re-request the link. Each new link replaces the old one. Still nothing after a few minutes? Your email may have a typo on our side; get in touch and we'll sort it.
- Can I change the order of moments on the day?
- Yes. Drag a moment by its grip handle to retime it, even mid-event. Everyone signed in sees the change as it happens; share-link viewers get the current plan whenever they open or refresh their link.
- What's the difference between “can view” and “can edit moments”?
- Viewers see everything and change nothing. Editors can add and adjust moments. If someone should run the whole event with you (managing people and settings), use Make co-lead on their People row instead.
- Can someone be on the timeline without an account?
- Yes, two ways. Subjects (the people being photographed) never need accounts. And anyone can watch the timeline through a read-only share link without signing up.
- How do I put the timeline in Google or Apple Calendar?
- Grab your subscription URL from the Timeline tab. Apple and Outlook subscribe in one tap with Subscribe now; Google Calendar takes the URL under Settings → Add calendar → From URL.
- Can vendors see it without signing up?
- Yes. Tap Generate share link on the People tab, send them the link, revoke it when the event's done. Read-only, no account, current every time they open it.
- What photo formats work for subject photos?
- JPG, PNG, or WebP, up to 2 MB. Phone photos are usually bigger than that. A screenshot of the photo is an easy workaround until we handle large files better.
- Is it really free?
- Yes. It's a free tool Keira offers her clients to help shoots run smoothly. No card, no trial clock.
Still stuck?
Write to us through the contact page. It lands with an actual human who knows the tool.